Restoring the Varengeville Room to Original Size
The Varengeville Room at the Met is a compilation of the museum’s 18th century furniture acquisitions and paneling from the Hôtel de Varengeville in Paris, a private residence utilized from 1736-52. The paneling was commissioned by the Comtesse de Varengeville’s daughter, Jeanne-Angélique Roque de Varengeville, the Duchesse de Villars, from the sculptor-designer and paneling expert Nicolas Pineau who spurred the Rococo movement in design (1684-1754). Curators are unsure exactly which room the paneling belonged to in the hôtel. This question is complicated by the fact that these panels or boiseries were made to be moved from home to home if need be. The original room that once existed in the hôtel would have exemplified the trend of 18th century residences becoming smaller. “No longer were bigger houses in fashion to display one’s wealth. In the ‘age of downsizing,’ these new, smaller spaces were more intimate, cozier, easier to heat, and to light” (DeJean, 39). In contrast to the former en filade system of planning spaces in which all rooms are connected by a long hallway, homes began to be planned in order to maximize privacy in these more personal, upper level spaces.
Because the Varengeville Room had been “assembled to serve as an effective setting for furniture,” it had to be enlarged. When the Met’s “French Galleries” were reconceptualized in the 1960s, curators decided to enlarge the space to its current dimensions of 40 feet in length by 23 feet in width and 18 feet in height. The nine new panels needed to enlarge the room were manufactured in Jansen’s workshop in Paris from 1963-64, adding to the eleven original panels (Parker). The modern paneling fits seamlessly with the 18th century work, as these remaining Parisian workshops still retain the same traditional practices and quality of craftsmanship that dates back to the 18th century and are usually called upon for museum restoration projects such as these. Rather than being concerned with historical accuracy exclusively, these galleries are considered artistic period rooms.
Process of Resizing the Room
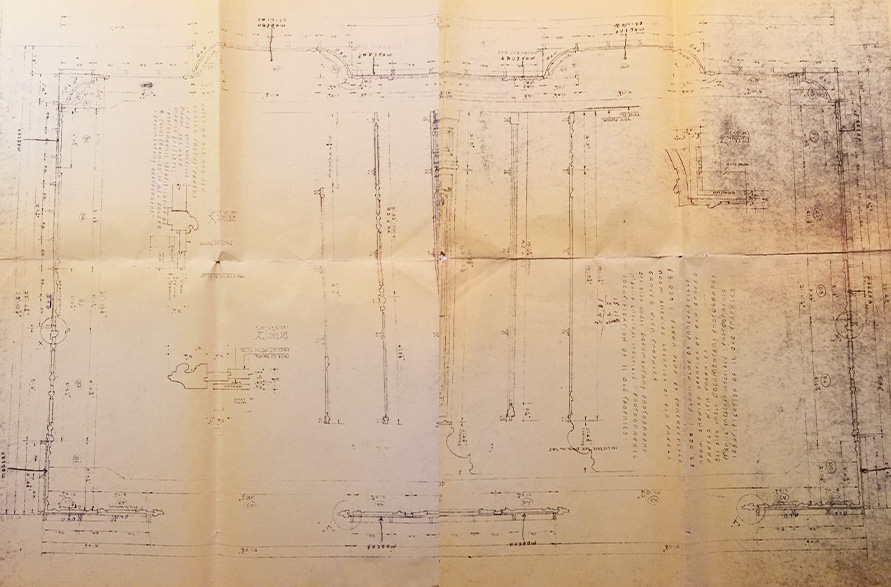
Current Floor Plan of the Varengeville Room

Left & Above: Floor plan of the Varengeville Room in the Metropolitan Museum of Art’s Wrighstman Galleries. Created by using photos taken by me of the floor plan supplied by Curator Daniëlle Kisluk-Grosheide and compiling separate photos to create entire floor plan (the museum does not have a scan of the floor plan).
Right: Enlarged floor plan with added labels showing where the modern panels were added by the museum. The red lines outline the spaces of the room that need to be cut out in order to restore the Varengeville Room to its original size with its original paneling.
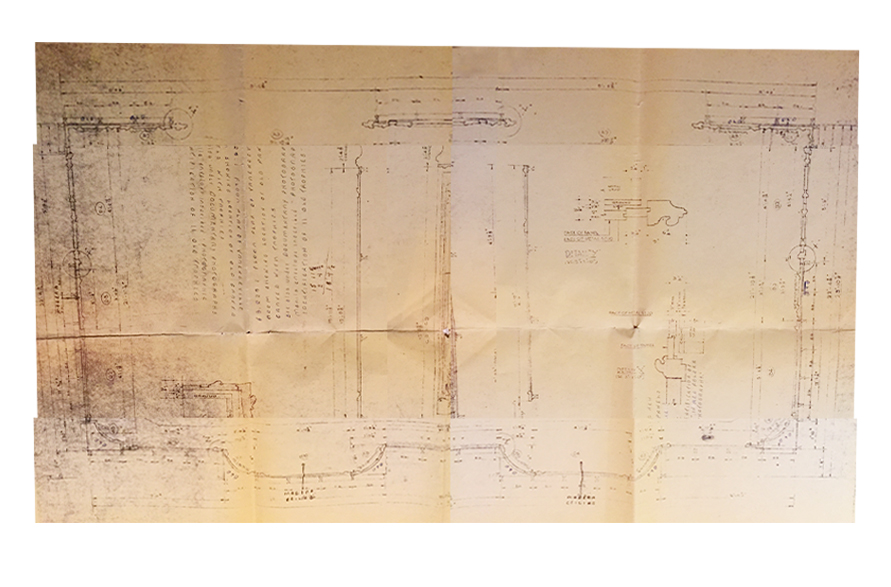
Resized Floor Plan of Varengeville Room
Left: To digitally resize the room, I relied on the composed floor plan of the Varengeville Room in its enlarged state to see where the modern additions were made.
Right: I took the enlarged floor plan and cropped out the parts of the room that were added by the addition of new panels. This digital restoration allows viewers to see what the shape and size of a mid-18th century private French interior might have looked like and was consulted to see how to reduce an image of the Varengeville Room in size. The white border remains to show how much the floor plan reduced in size once I cropped out the additional panels and the space they added to the room. Having the enlarged floor plan and the scaled floor plan next to each other is helpful to see how much the size of the room is reduced.
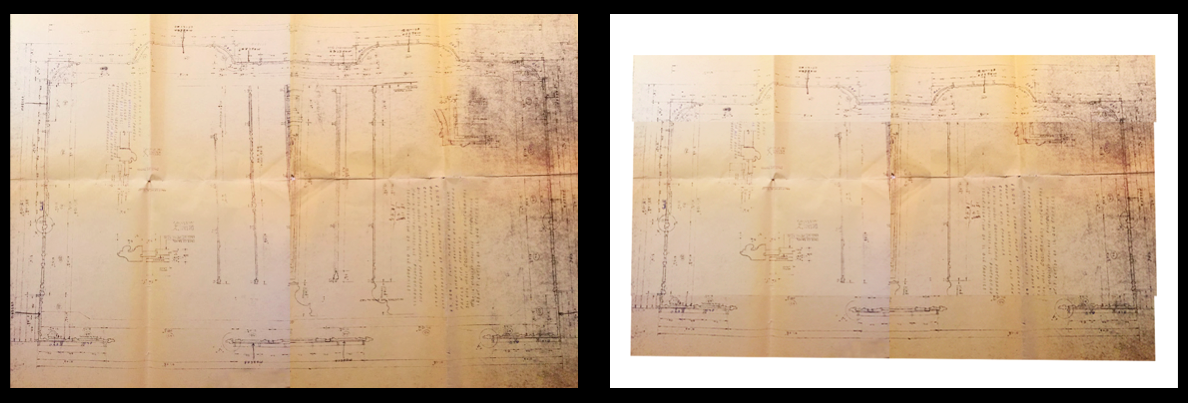
Left: The Varengeville Room in its current enlarged state in the Met’s Wrighstman Galleries. This is the image of the room I used to create the resized restoration.
Right: Using the image on the left, I added lines to highlight areas of modern paneling visible from this angle of the room. These are the panels that I cropped out in order to create the smaller-scaled room below.
Resized Varengeville Room

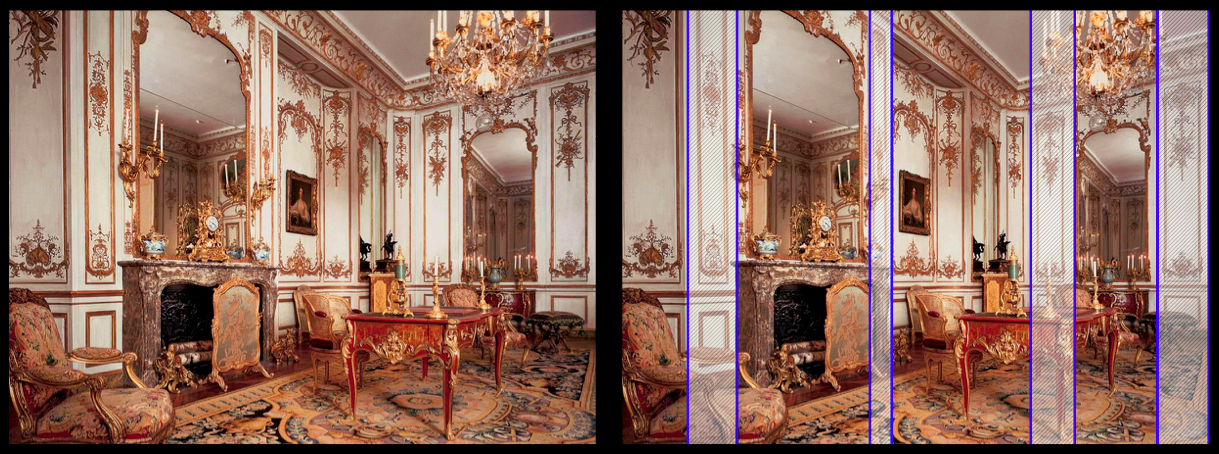
Comparison – Enlarged vs. Original Size
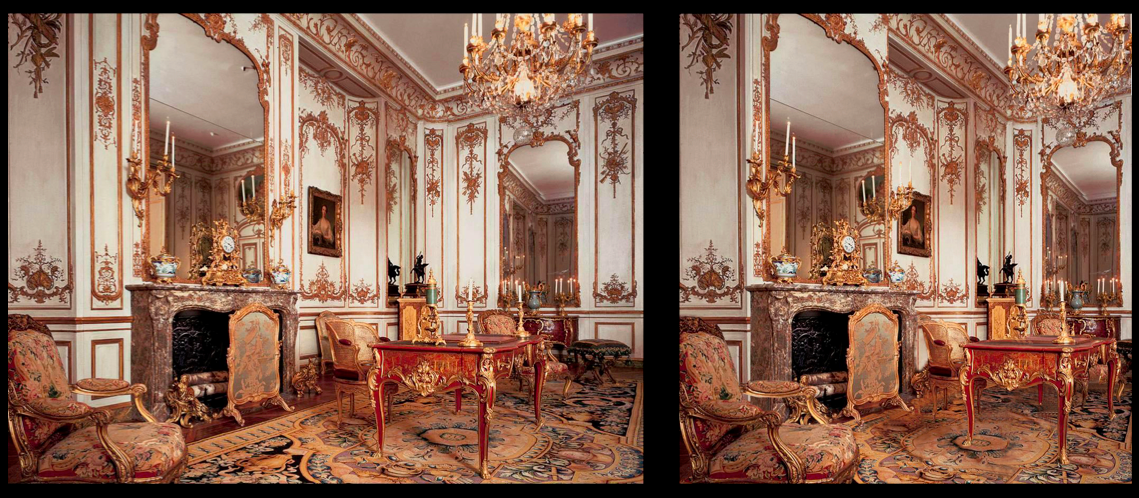
Left: Image used above in comparison to the resized room restored to original size on the right.
Right: Final creation of the resized Varengeville Room with subtracted modern panels. I used the floor plans above to locate the modern panels, which I then cropped out. In order to make the room smaller, I used Photoshop to extract each piece of furniture individually. I then cut out the four modern panels highlighted in the image above. I had to then re-add each piece of furniture individually on separate layers to make sure none of the original contents of the room were lost and scale them down slightly so that they fit into the smaller room properly. The carpet was the most challenging part as I had to use the stamp and blend tool to recreate pieces of the carpet that had to be removed in order to shrink the room down to size. The true effects of reducing the size of the room are visible in my lighting renditions on the next page, as the smaller size of the room drastically changes the relationship of all of its elements to each other.
Click here to continue to Lighting Restoration…
All Composite Images & Text by Alex Bass